In the class Learning the World, One Thing at a Time, taught by Lydia Jessup, we learned about the Implosion research method to deeply analyze and research an object we encounter in every day life across the following dimensions: Labor, Professional, Material, Technological, Context, Political, Economic, Textual, Historical, Particle, Educational, Mythological, and Symbolic.
If you're interested in learning more about the method itself, I wrote an article about it here:
Really, the Implosion Method implores us to ask two questions about our chosen object:
- How does the object exist in the world?
- How does the world exist within the object?
Research
We had one week to choose an object and study it across 2+ dimensions and use 2+ different research sources, such as archives, interviews, or surveys.
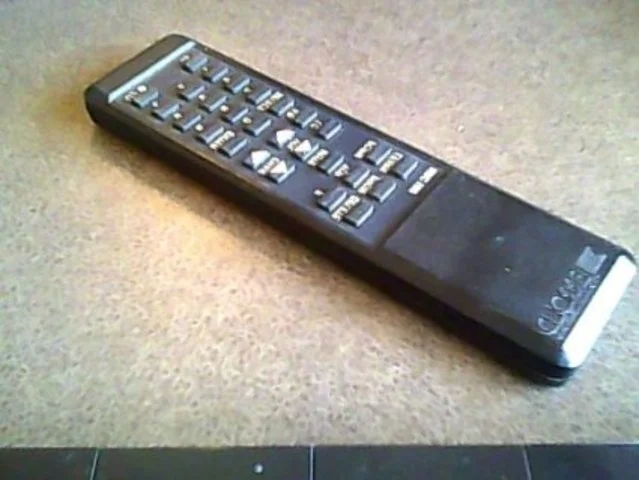
I chose a Zenith TV remote I found on a junk shelf for my chosen object. I studied Human-Computer Interaction and am always excited to learn more about interaction devices, so it seemed like a perfect fit! I also wanted to choose something that we all take for granted and use most days.
I chose to study the history of the TV remote, as well as the technology behind it. If I had time, I would also look at context and mythology. All of these dimensions are interwoven.
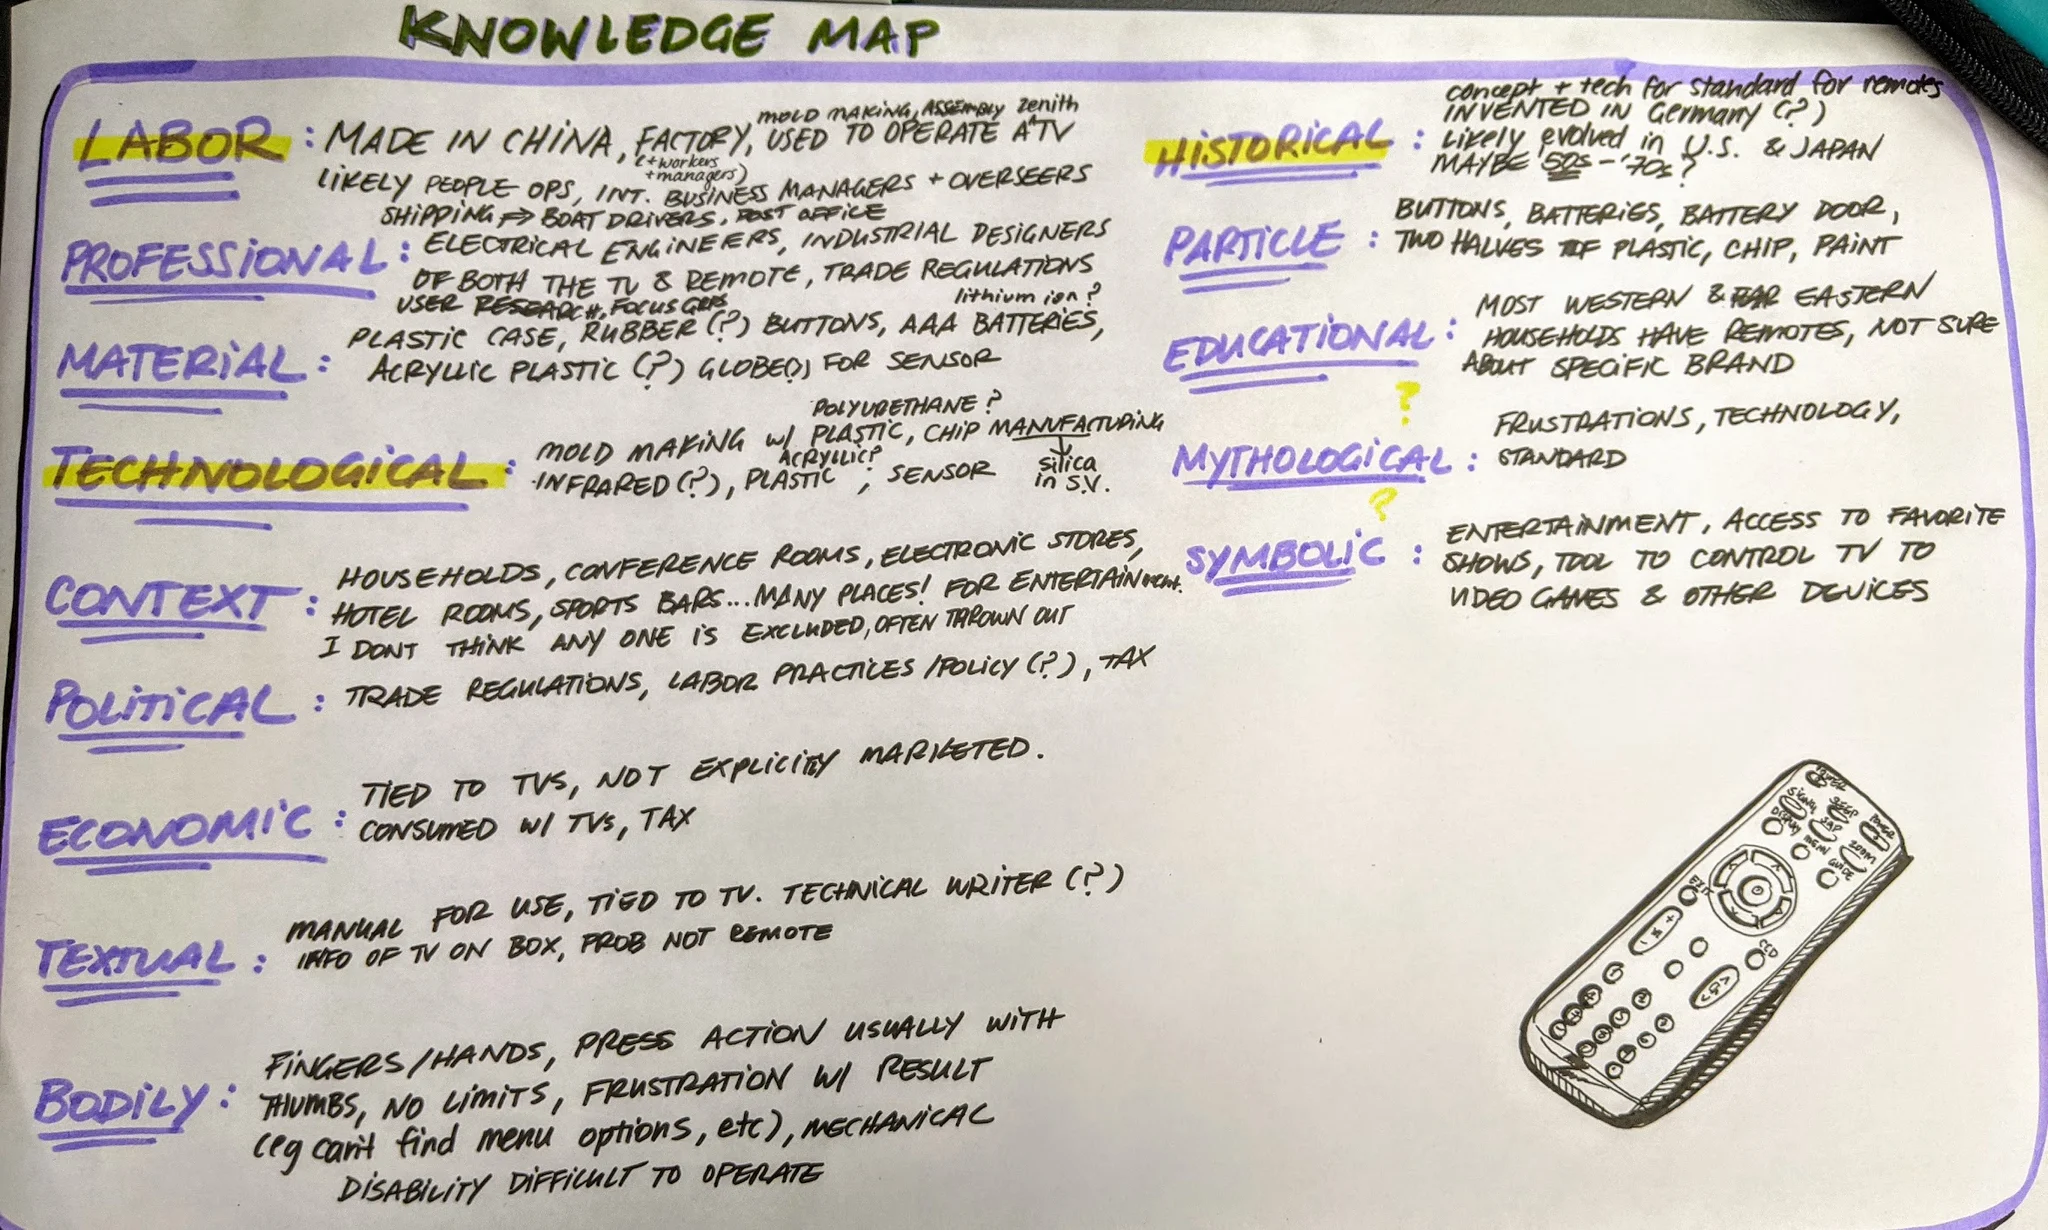
As per the Implosion Method, I started by making a Knowledge Map of what I already knew:
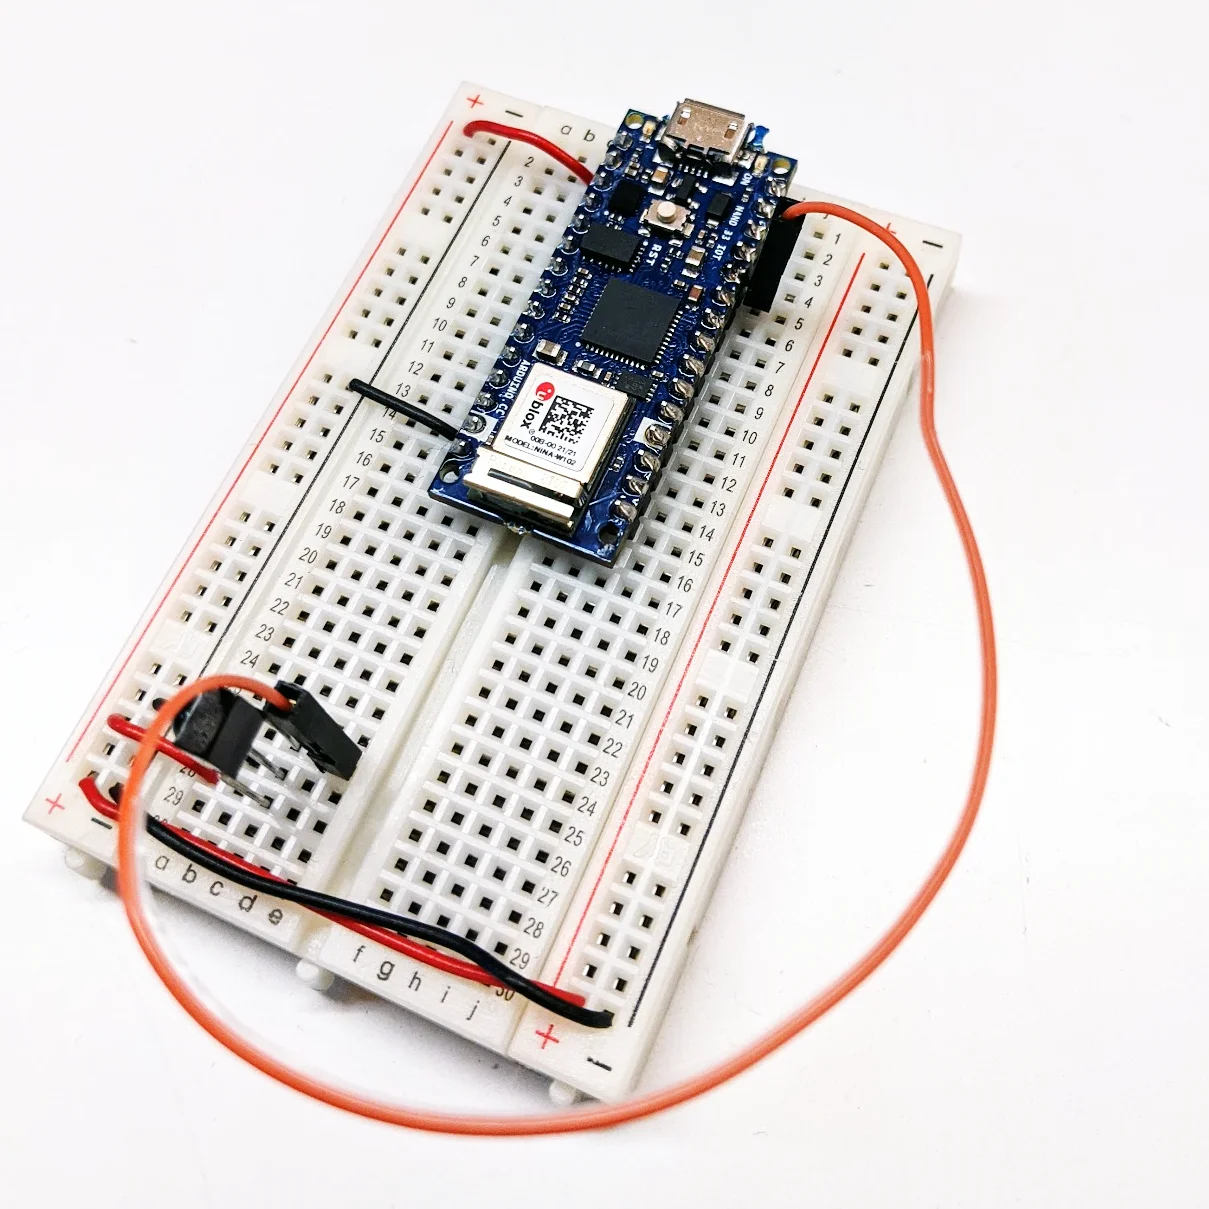
I started my process by tearing apart my remote to see the components inside:

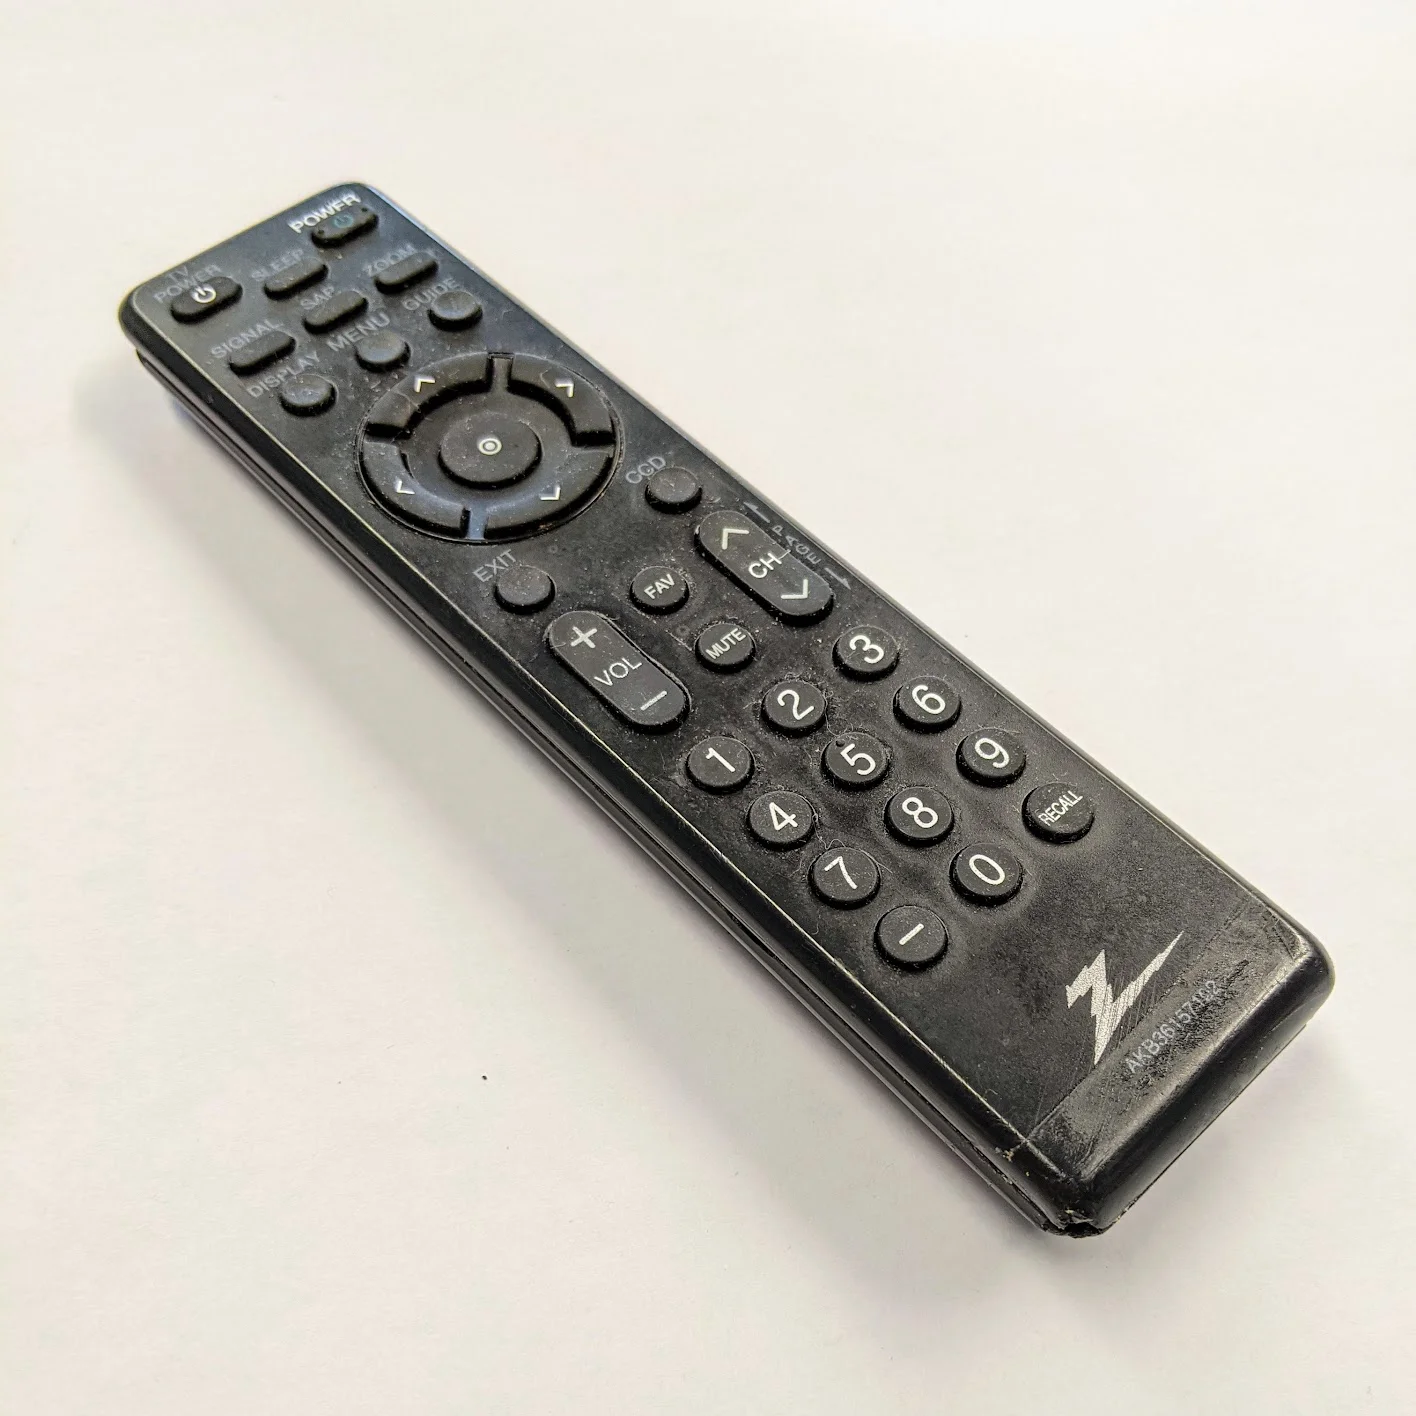
Unfortunately, I wasn’t able to find out which exact model of remote I had, and the serial numbers were scratched off the back. I did find out it uses infrared sensors to operate, which is a later development in the invention of remotes. Speaking of…
History and Technology
Let’s talk about the history of the remote!
Source: Engadget
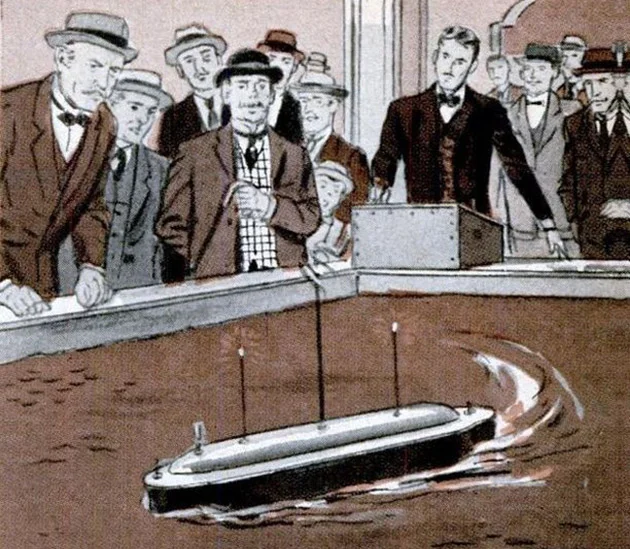
1898 - The first remote
  | Nikola Tesla demos the first remote controller at the New York's Madison Square Garden. He used radio frequency (RF) to control a toy boat on an indoor pool. He named is remote-controllable boat a teleautomaton. Many deemed his invention as magic and many criticized it for its potential to be used in warfare. |
Source: Google Arts & Culture
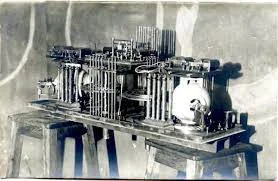
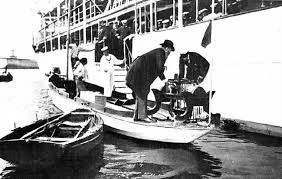
1902 - A remote fit for a king
 | Leonardo Torres-Quevedo creates what he calls the “Telekino”, a remote control for vehicles. Unlike Tesla’s radio waves, which were able to spread farther distances and omnidirectionally, these used telegraph transmitters. His original demo in 1902 was on a tricycle.Torres-Quevado originally invented the telekino in mind for navigating dangerous vehicles to save human lives, such as hydrogen-filled airships. In 1905, it was demoed on a real boat with real passengers in the presence of King Alfonso XIII. |
(Source: Military History Now)
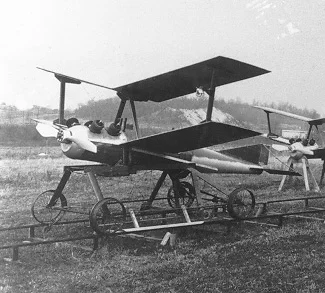
1932 - Unmanned WWII vehicles
 | Concerns about remote-controlled vehicles becoming weapons in war came as the Germans created RF boats filled with explosives designed to collide into enemy ships.Others also experimented with unmanned war vehicles. The United States made an unmanned aerial torpedo called the Kettering Bug. These used a similar radio frequency technology that Tesla’s original RC boat did to allow pilots to control torpedos after launching them. |
(Source: Philco Repair Bench)
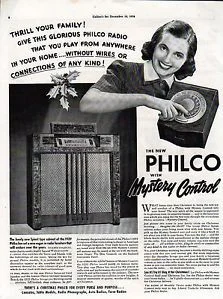
1930s - Radio remote controls
 | In the same years remote controls were being used for warfare, radio companies were releasing controllers for their radio sets. Many of the first ones were wired and controlled through the house AC line.In 1939, the Philadelphia Storage Battery Company (Philco) created the first wireless remote control for the radio, the This remote also used RF technology.As per the Gartner Group Hype graph we saw earlier, the Mystery Control was wildly popular and adopted quickly between 1939 and 1942. Once the hype died down, it became a commodity and other radio companies followed suit. |
(Source: Electronic House/TVHistory.tv)
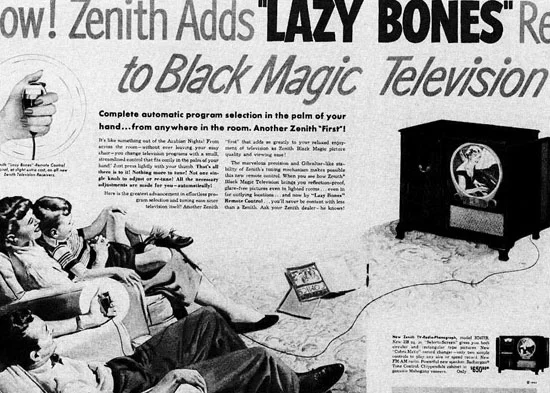
1950s - Wired TV remotes
 | Zenith invented the first TV remote, the Lazy Bones, and released it in 1950.Unfortunately, just like how radio started with wired remote controls, so did TVs. Lazy Bones was not a raving success because of the inconvenience of the long, snaking wire. |
(Source: LG Electronics/European Pressphoto Agency)
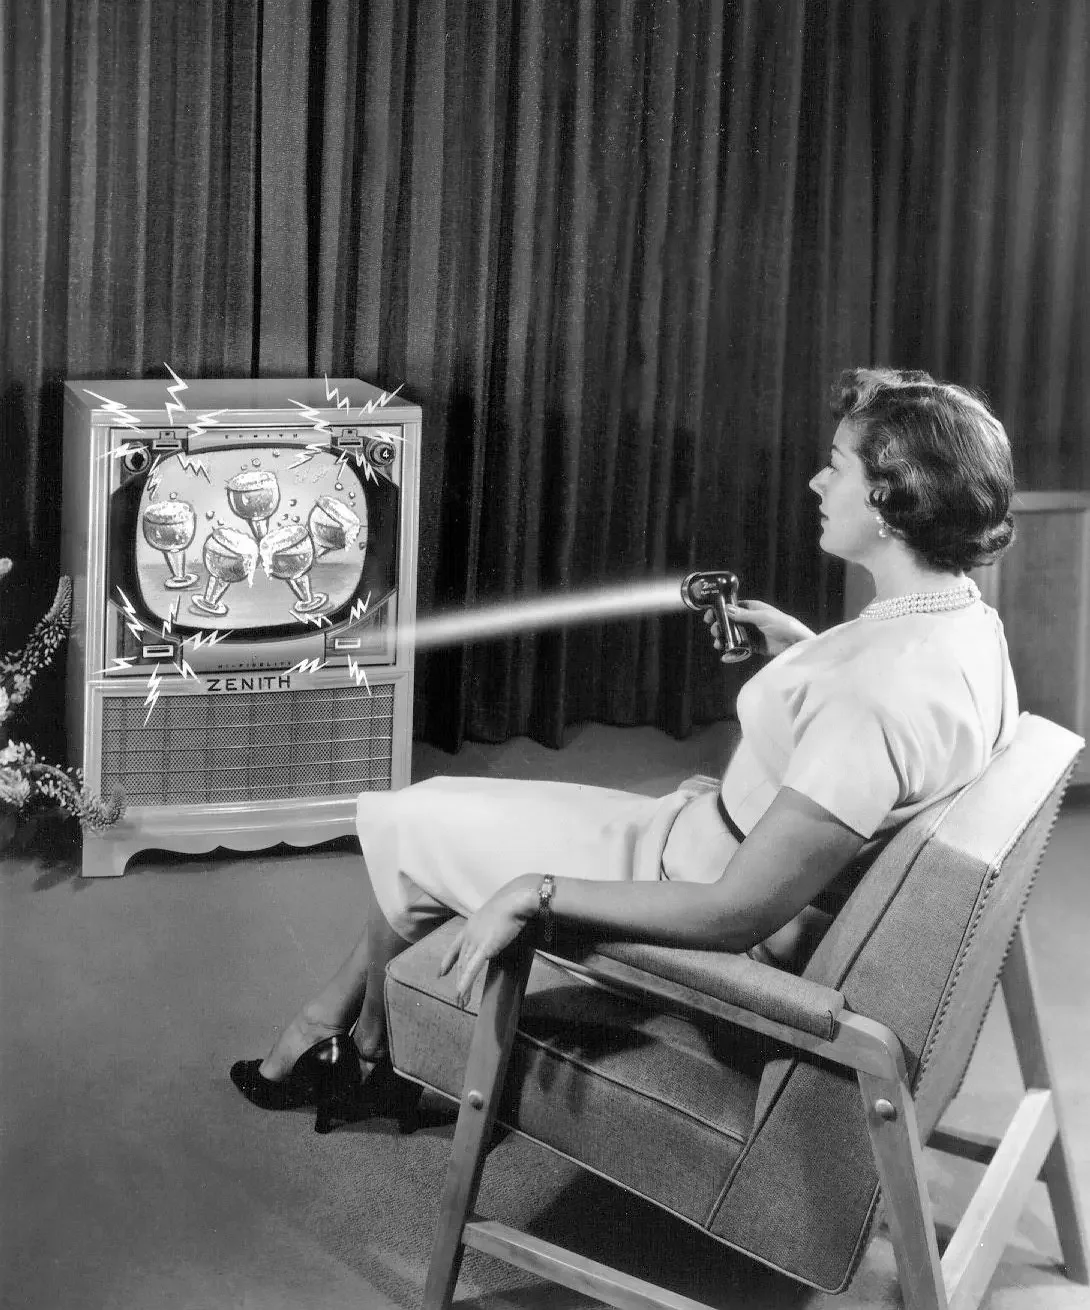
1955 - First wireless TV Remote
  | Eugene Polly, a researcher and engineer from Zenith, invents the first wireless TV Remote, the Flash-matic.The Flash-matic used light to relay signals. Each TV was equipped with photocells in each of the four corners that detected beams of light, encoded with the instruction, emitted from the remote. The concept of a completely wireless TV remote was a game changer, but the technology was short-lived. The Flash-matic suffered from light conflicts as well as a huge steep tag, so it didn’t last long on the hype chart. |
(Source: Alamy)
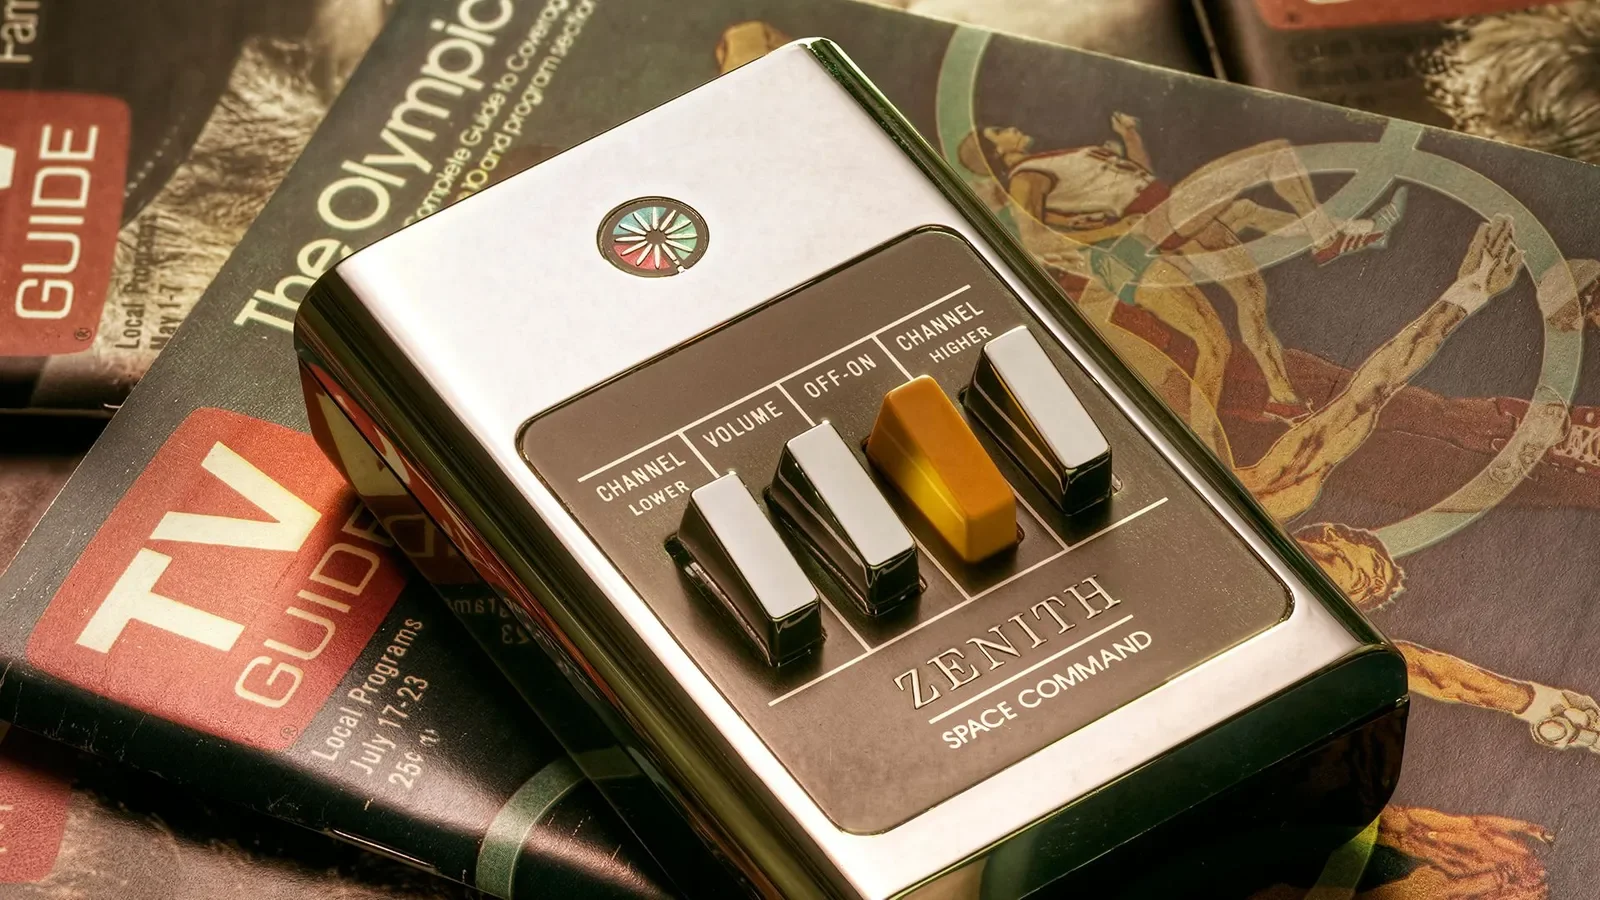
1956 - Invention of the “clicker”
 | Robert Adler, a physicist, invents the Zenith Space Commander.Instead of using light or RF, Space Command TVs detected sounds produced by physical hammers in the remote. The remote didn’t require batteries because of this implementation, and each remote produced a satisfying clicking sound in addition to an ultrasonic sound inaudible to most humans. In fact, this is the reason why we call remotes “clickers” todayThis ultrasonic technology served as the primary tech in TV remotes until the mid ‘80s, when infrared remotes started taking over the scene. |
(Source: TimeToast)
1973 - Teletext and multi-button remotes
 | Up to this point, remotes only included a handful of buttons for volume, next channel, previous channel, on and off.In the ‘70s, BBC introduced the Ceefax teletext service. Teletext was a type of service that broadcasted metainformation about programming to TVs, showing it as a fact sheet overlay on the screen. To operate the overlay, more buttons had to be added to TV remotes. This included the numpad we’re so familiar with today. |
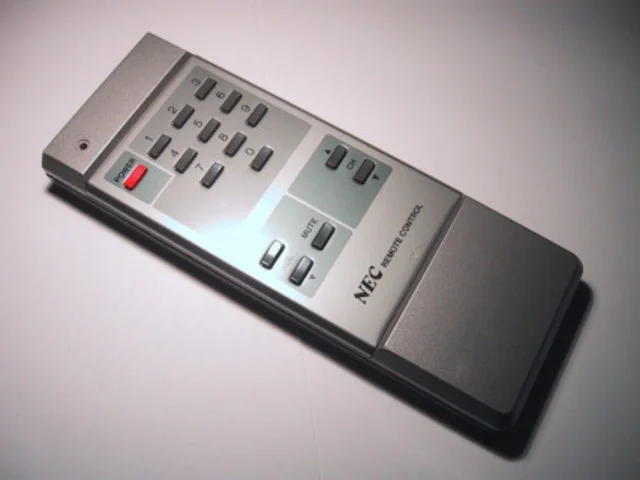
1980 - First infrared remotes
 | Though ultrasonic, and other sound-based “clickers”, were still the most popular remote technology, they suffered from some major issues. Many of them would irritate house pets and children because of their high frequencies. Meanwhile, other light-based remotes experienced interference by indoor light sources like lamps.Infrared was already being used for other household uses, such as garage door openers. Engineer Paul Hrivnak at Canadian company, Viewstar, Inc., applied that tech and produced the first infrared TV remote for Phillips priced at $190CAD.Infrared became so wildly popular, they quickly rose in popularity beating out the previous ultrasonic remotes. |
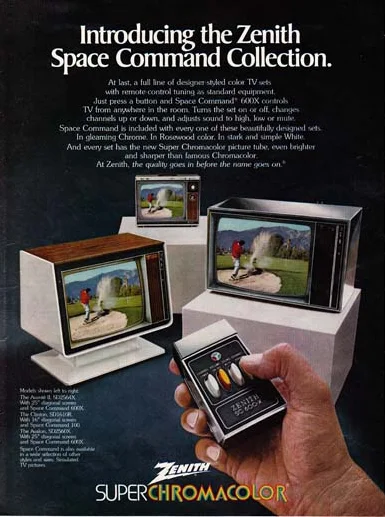
(Source: Tedium)
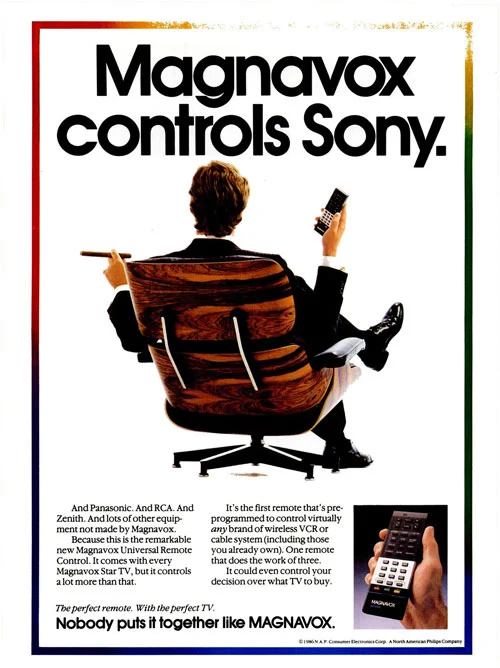
1985 - Universal remotes
 | The idea of a reconfigurable remote that can control multiple devices was patented by Philips in 1985, and soon thereafter they released their Magnavox universal remotes.In 1986, General Electric also patented a reconfigurable universal remote, stating that a remote should be able to control a television, a cable converter, video cassette recorder, and a video disc player so to remove confusion and inconvenience to the user. |
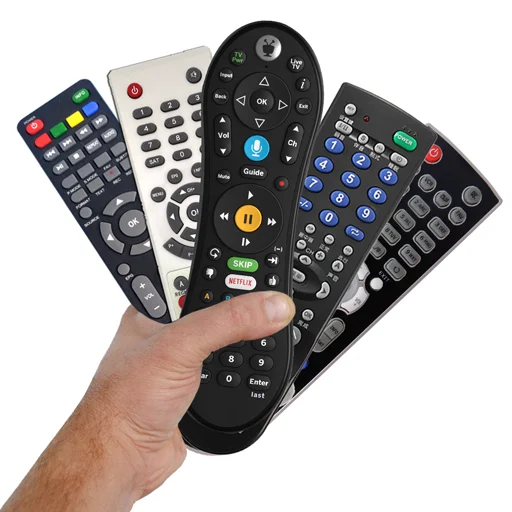
(Source: “Remote Control for All TV” on Google Play )
Early ‘00s - Swimming in remotes
Households in pre-smartphone America often had five or six remotes, including one for cable or satellite receiver, VCR or digital video recorder (DVR/PVR), DVD player, TV and audio amplifier. Universal remotes became more and more common, but devices were appearing quicker than remotes could even keep up with them. |
(Sources: “TV Remote” on the App Store)
‘10s to now - Smart TVs, Bluetooth, and apps
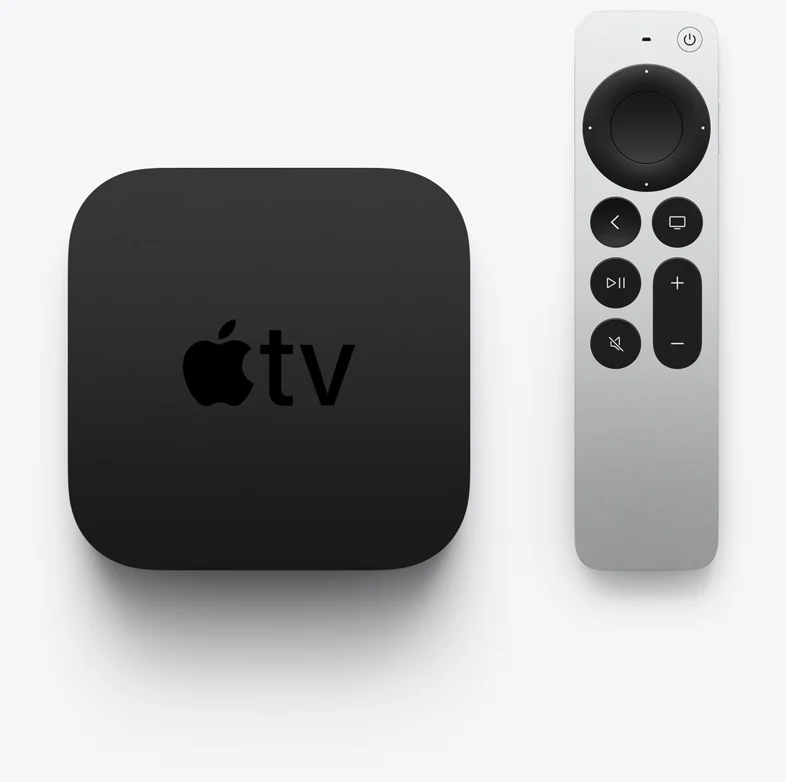 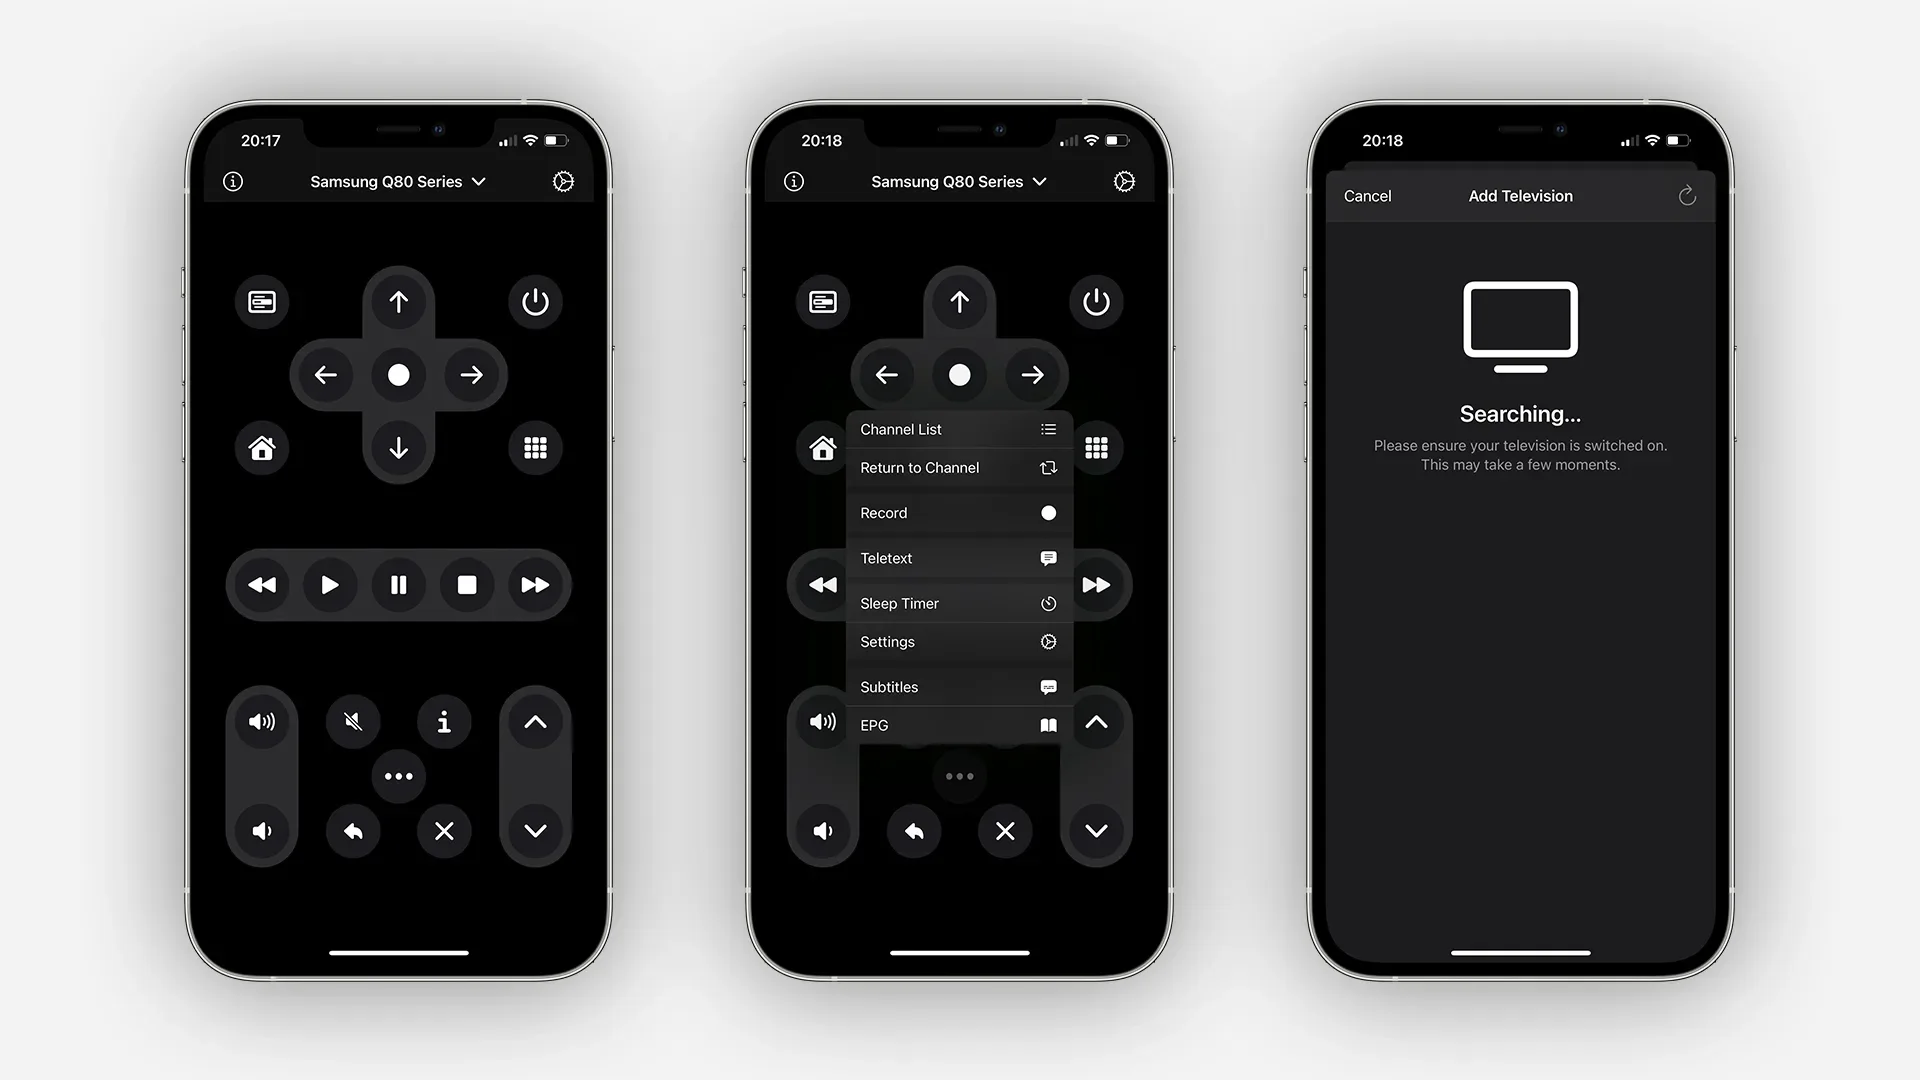 | Today, the default technology for TV remotes is still infrared, however more technologies are emerging as the broadcast television landscape is changing.In the mid 2000’s, the Apple TV Siri remote was released, which had a trackpad instead of buttons, supported voice control, and used Bluetooth technology instead of infrared.Around the same time, Roku, Google Chromecast, and Amazon Firestick were all released, most now supporting phone app navigation, usually through Bluetooth or WiFi.TV remotes have really come a long way! |
Technology & Presentation
One of the requirements of this class was to present our findings in any way we’d like without using a slide deck.
I thought a fun way to present the history, context, and mythology of the TV remote was to create a “TV” that receives messages from a TV remote and flips between “channels”, each showing a different piece from the history of the remote control.
I poked around on YouTube after learning the history of the remote, and created a playlist of videos I’d like to act as the base of my TV programming:
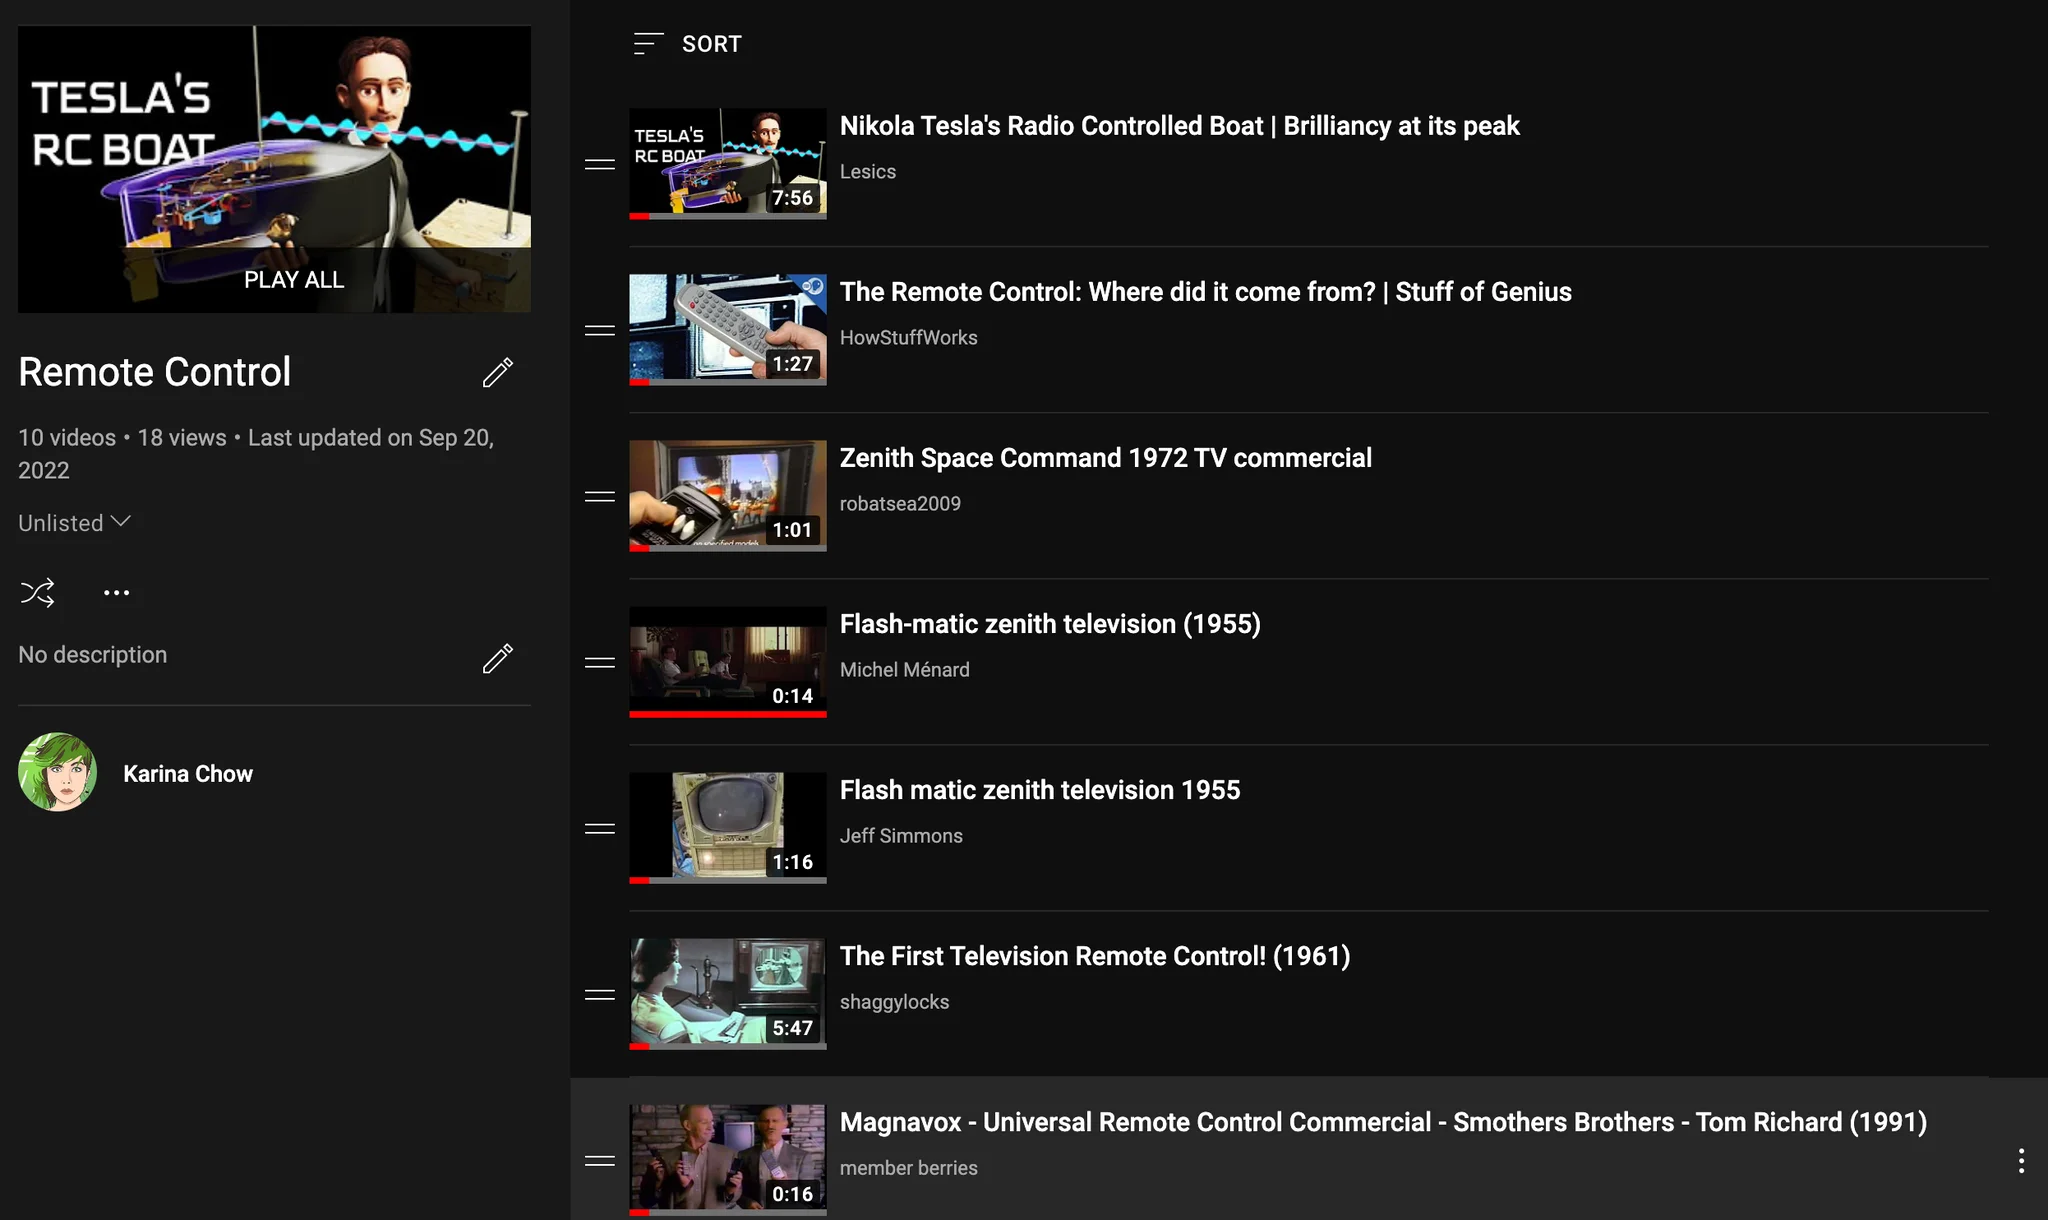
Here's the playlist if you have any interest in seeing it!
Ideally, a person could surf between channels with the remote, and go between these videos (with some added effects)!
So it’s kind of like a slide deck, but much more highly engineered.
Pretty meta, huh?
To top it off, I also wanted it to be a bit of a comedic piece and make the TV a little unpredictable, complete with static and some random aspects. Haven’t we all surfed around, looking for the right channel, or fought with our TV volumes?
All right I’m sold. Let’s build a fake TV!
Though many new technologies for remotes are emerging, infrared is still the default and prevailing technology from the ‘80s until now. So let’s make a TV that responds to an infrared remote. In fact, let’s make one that responds to the Zenith remote that I found in the junk shelf!
In order to build our fake TV that is operated by an infrared remote, we need to be able to receive infrared messages.
So what is infrared and how does it even work?
What is infrared?
Infrared radiation (IR) is a band on the electromagnetic radiation spectrum above the visible red spectrum, thus imperceptible to the human eye. It operates on wavelengths between ~700 nm and 1 mm:
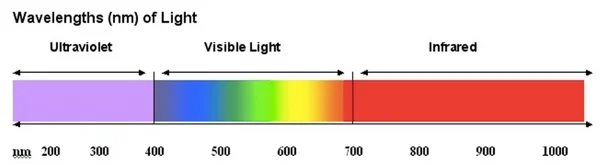
Because its wavelengths are beyond the perceptible realm, it usually does not interfere with the visible light spectrum. This makes it a much more ideal choice for remote technology than others relying on light, like the Zenith Flash-matic remote.
You’ve probably noticed your IR remotes actually have a little LED attached to them. This is called an infrared emitter:
Totally not required, but I had fun taking apart my Zenith TV remote to show what the infrared LED really looks like and how it is connected to the board.
You can’t see it, but every time you click a button on your TV remote, it sends a pattern of blinks with that light. If you are interested, you can actually try holding your camera up to it and clicking a couple buttons to see it flash. Not all cameras are able to detect it, however!
Your TV has an infrared receiver, which is a small sensor that is able to detect these blinking patterns. Unlike other technologies like Bluetooth or radio frequency, this receiver needs an unobstructed path to the emitter. It needs to see the light as it blinks. This is why your TV remote will not work in another room or with too many people in the way!
The microprocessor within your TV is able to use this receiver to detect the blinks, and in turn decode them into commands. Similar to how a series of dots and dashes in Morse code denote a letter, a series of blinks denote different commands.
There have been many protocols over history, like Phillips’ RC-5 and NEC’s transmission protocol, that many devices used. RC-5 was more well defined; any receiver could receive a code following that protocol and know exactly what was meant. NEC’s, on the other hand, included adding in headers so each manufacturer could specify custom codes. If you read the links above, you can see how they were defined as lengths of time of being on and off in µs. It’s actually super interesting!
Creating the plan
Now that we understand what is involved with infrared, we can map out what needs to be done in our project.
When a person presses a button on the Zenith remote, the IR emitter of the remote will send out a series of quick blinks following a protocol. We need an IR receiver to detect these blinks, and some code to decode them to know what button the person pressed. These two steps will be done on our Arduino Nano.
I initially wanted my entire project to be self contained, with just a microcontroller and a monitor (no computer), but I didn’t receive my Raspberry Pi Pico quickly enough to do so. The next best thing I could do was have my Arduino Nano tethered to my computer use my computer screen as a TV.
In order for my Arduino Nano to communicate to my computer, I would have to relay messages across a serial port. In this case, I would print my remote commands over 9600 baud to be received by another program, running on my computer. This program will have to be listening to the serial port for incoming messages, then execute code in response to every message.
Here’s a visual representation of the flow we want to achieve here:
.webp)
Ok, onto the first few hardware steps on receiving IR messages!
Receiving infrared messages
Luckily for me, we don’t need to know the protocol because nowadays, we have handy dandy libraries to do the decoding for us!
To receive messages, we need an…
…
Infrared receiver! That’s right.
Also luckily for me, infrared receivers are extremely cheap on Adafruit:
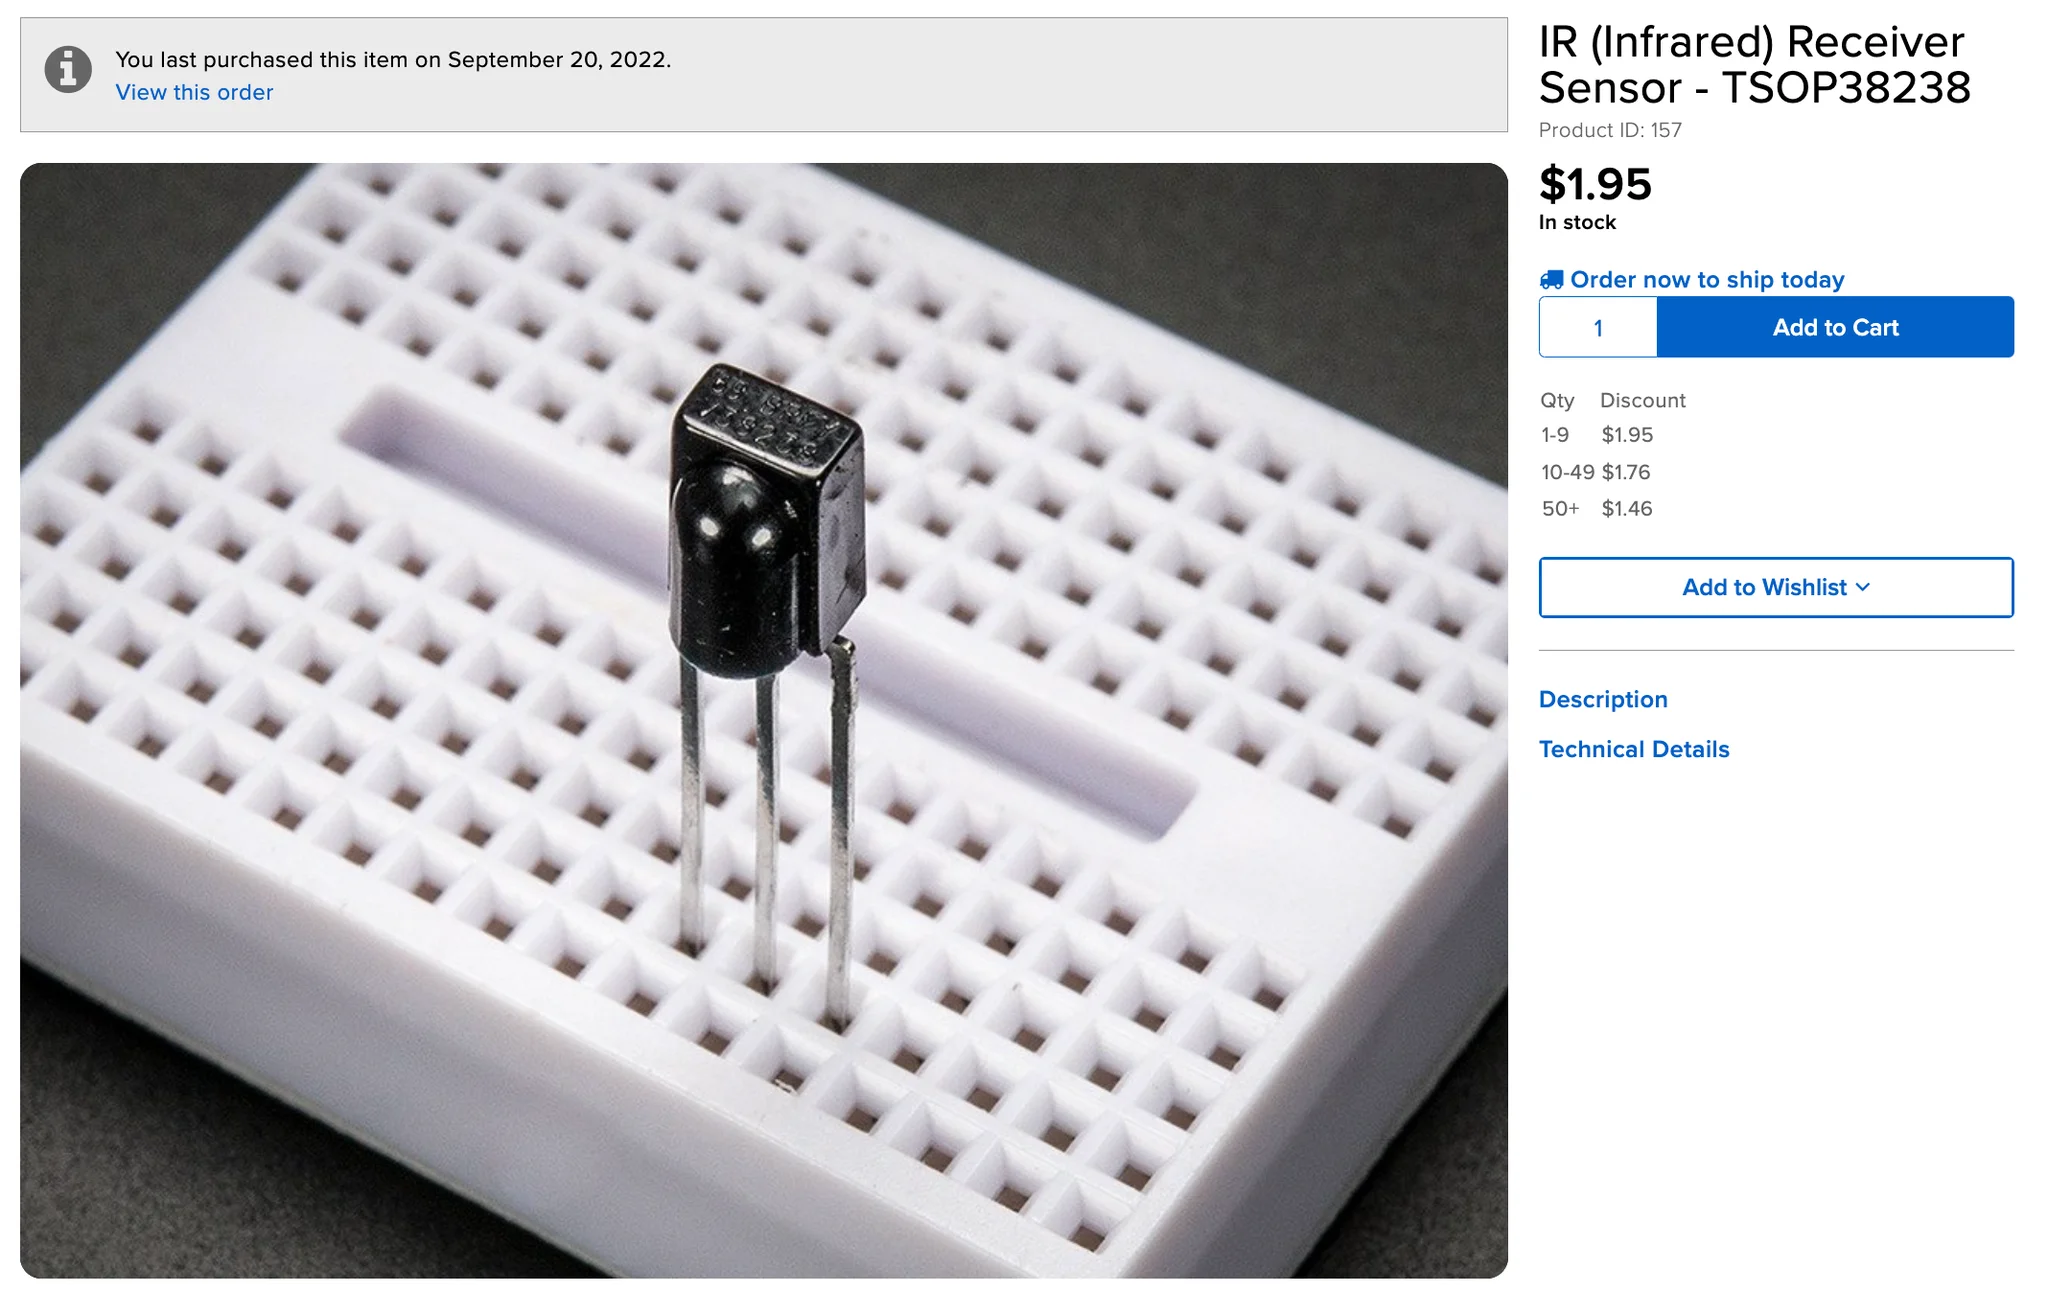
An IR receiver is only $1.95 on Adafruit!
Using an Arduino NANO, I just needed to make a simple circuit. An IR receiver has 3 pins: one for power, one for ground, and one for digital out.
I got inspiration form this handy article to make something very basic:
Using the IRremote.h package for Arduino, I was able to easily set up a simple program that was able to detect values sent from the emitter.
This package transforms the decoded messages into hexadecimal, which we can store as unsigned long int and simply compare like any regular integer.
I didn’t know what protocol my remote used, so the easiest thing I could imagine was to simply print what the receiver got in hexadecimal for each button, and create constants to compare against in the future.
# include <IRremote.h>

const int IR_RECEIVER = 8;

IRrecv irrecv(IR_RECEIVER);
decode_results results;

void setup() {
  irrecv.enableIRIn(); // Start the receiver
}

void loop() {
  if (irrecv.decode(&results)) {
			// Here we can print out what we receive and build out a giant
			// switch statement in the future
      Serial.println(results.value, HEX);
      ...
      irrecv.resume(); // Receive the next value
  }
}
From this, I would get values like 0xEF1000FF when I clicked the channel up button on the remote. After doing this for all the buttons I wanted to work with, I finalized my list of constants:
const unsigned long CHANNEL_UP = 0xEF1000FF;
const unsigned long CHANNEL_DOWN = 0xEF10807F;
const unsigned long HELD_BUTTON = 0xFFFFFFFF;
const unsigned long POWER_BUTTON = 0x61A0F00F;
const unsigned long SUPER_POWER_BUTTON = 0xEF1010EF;
const unsigned long VOLUME_UP = 0xEF1040BF;
const unsigned long VOLUME_DOWN = 0xEF10C03F;
const unsigned long MUTE = 0xEF10906F;
This list of constants will differ from remote to remote, so if you decide to do a similar project, copy pasting probably wouldn’t work!
I could relay these hex values as-is over my serial port for my future TV application to interpret, but for the sake of readability, I decided to encode them into plain English constants, with the same name as the constant names above.
In the end, this is what I ended up with on the Arduino side of things:
#include <IRremote.h>

const int IR_RECEIVER = 8;

const unsigned long CHANNEL_UP = 0xEF1000FF;
const unsigned long CHANNEL_DOWN = 0xEF10807F;

// HELD_BUTTON was sent when any button was held down
// Think like holding down CHANNEL_UP to surf channels quicker
const unsigned long HELD_BUTTON = 0xFFFFFFFF;
const unsigned long POWER_BUTTON = 0x61A0F00F;
const unsigned long SUPER_POWER_BUTTON = 0xEF1010EF;
const unsigned long VOLUME_UP = 0xEF1040BF;
const unsigned long VOLUME_DOWN = 0xEF10C03F;
const unsigned long MUTE = 0xEF10906F;

IRrecv irrecv(IR_RECEIVER);
decode_results results;

void setup() {
  irrecv.enableIRIn();
}

void loop() {
  if (irrecv.decode(&results)) {
    unsigned long buttonAction = results.value;

    switch (buttonAction) {
      case CHANNEL_UP:
        Serial.println("CHANNEL_UP");
        break;
      case CHANNEL_DOWN:
        Serial.println("CHANNEL_DOWN");
        break;
      case POWER_BUTTON:
        Serial.println("POWER_BUTTON");
        break;
      case SUPER_POWER_BUTTON:
        Serial.println("SUPER_POWER_BUTTON");
        break;
      case HELD_BUTTON:
        break;
      case VOLUME_UP:
        Serial.println("VOLUME_UP");
        break;
      case VOLUME_DOWN:
        Serial.println("VOLUME_DOWN");
        break;
      case MUTE:
        Serial.println("MUTE");
        break;
      default:
				// Limiting messages received to only the above
				break;
    }

    irrecv.resume(); // Receive the next value
  }
}
Writing the TV Application
Call me crazy, but I decided to write my TV application with Electron, a framework that allows you to use your existing web dev skills in JavaScript, HTML, and CSS to create desktop applications.
A funny thing about this is that the new Arduino IDE, very recently released, is written in Electron.
Funny world.
Though I have over a decade experience of writing JavaScript applications, I had never written in Electron, and I only had one day to write an application. I didn’t end up doing it in the cleanest or best way possible, but I thought it was clever.
So here’s what I did.
Creating TV “channels”
In Electron, different views are usually different HTML files.
Each channel would have to have its own HTML page, and each channel change command from the remote would have to load a new page. Channel pages would essentially just be a <video> tag with a universal CSS stylesheet to make it full screen.
What I did to create channels was first I downloaded a ton of videos, each to represent a channel, and put them in a videos directory.
I then created a script called gen_channels.ts that would automatically take all videos in the videos directory and create HTML pages for each one. Every application build automatically runs this script.
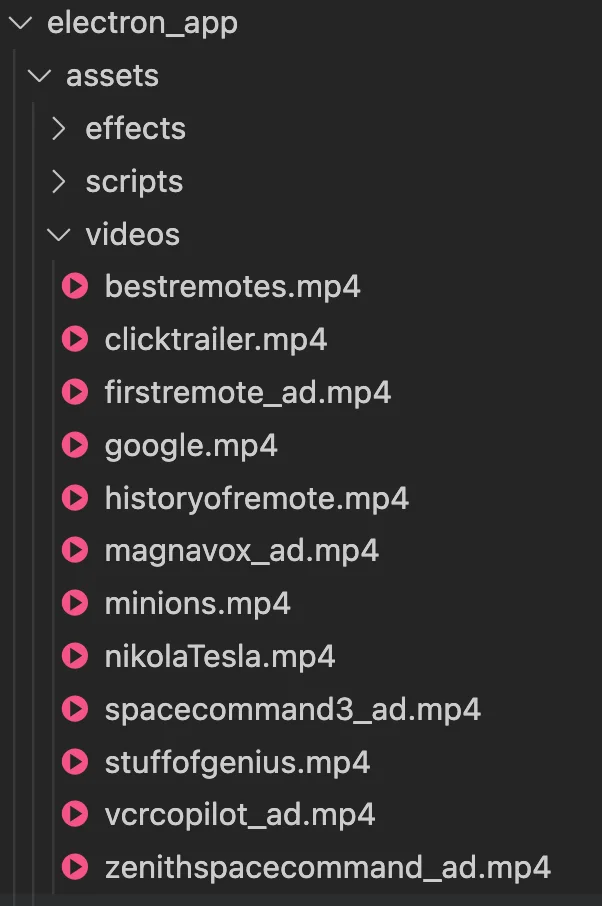 | 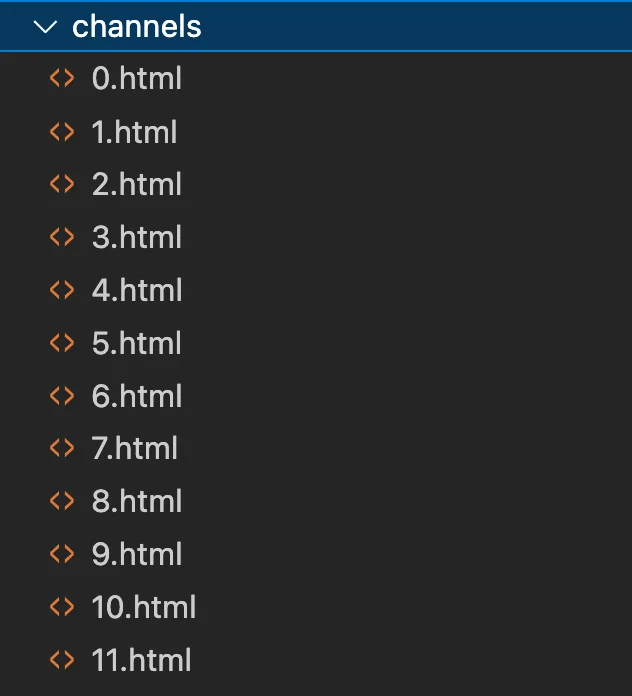 |
Generated channel HTML files from the source videos
I also wanted the TV to have an old time-y feel and have a randomized amount of static between each channel. However, because I wasn’t going to use a frontend framework like React, I needed to somehow squeeze this in upon page load for each channel HTML page.
In the jankiest fashion imaginable, I downloaded a video of TV static, and in my generation script, also included a <video> tag for just the static video.
I then wrote a JavaScript file to be included via a <script> tag on every page that fast forwards to a randomized space in the TV static video, and plays it for a randomized length of time, up to 100 milliseconds.
Maintaining state in an application for every channel was a little out of scope for the amount of time I had. To make up for this, I decided to make this presentation comedic in nature by randomizing the start time of videos on channels to make it feel more realistic…and to confuse me during my own presentation.
Here’s what the code ended up looking like for this part:
scripts/play_video.js
/**
 * The script that plays on every channel HTML page
 * to determine start times for static and channel videos
 **/
let video;
let static;
window.onload = () => {
  // Randomize where the static starts
  static = document.querySelector("#static");
  static.currentTime = static.duration * Math.random();

  // Randomize where the channel video starts
  video = document.querySelector("#channel");
  video.currentTime = video.duration * Math.random();

  // Keep the static playing for a random time up to 400ms
  setTimeout(() => {
    // Start playing the channel video after a random amount of time up to 100ms
    // Static will likely be overlayed over it with limited opacity for a good chunk of time
    setTimeout(() => {
      var playPromise = video.play();

      // In browsers that don’t yet support this functionality,
      // playPromise won’t be defined.
      if (playPromise !== undefined) {
        // For some reason, this is totally required
        // despite there being no functionality in either
        playPromise
          .then(function () {
            // Automatic playback started!
          })
          .catch(function (error) {
            // Automatic playback failed.
            // Show a UI element to let the user manually start playback.
          });
      }
    }, Math.random() * 100);

    static.remove();
  }, Math.random() * 400);
};
gen_channels.ts
/**
 * The script that generates channels (HTML files) from raw videos
 */
const fs = require("fs");

const CHANNELS_DIR = "./channels";
const VIDEOS_DIR = "./assets/videos";
const VIDEO_FILES = fs.readdirSync(VIDEOS_DIR);

const gen_channels = () => {
  VIDEO_FILES.forEach((file, i) => {
    const data = `
<!DOCTYPE html>
<html>
  <head>
    <meta charset="UTF-8" />
    <meta
      http-equiv="Content-Security-Policy"
      content="default-src 'self'; script-src 'self'; style-src 'self' 'unsafe-inline'"
    />
    <link href="../styles.css" rel="stylesheet" />
    <script src="../assets/scripts/play_video.js"></script>
    <title>Channel ${i}</title>
  </head>
  <body>
    <div id="tv">
      <!-- Channel does not autoplay...see play_video.js -->
      <video id="channel" preload="auto" data-setup="{}">
        <source src="../assets/videos/${file}" type="video/mp4" />
      </video>
      <!-- Autoplay the static to make it seem like a transition -->
      <video id="static" preload="auto" autoplay>
        <source src="../assets/effects/static.mp4" type="video/mp4" />
      </video>
    </div>
  </body>
</html>
`;
    fs.writeFileSync(`${CHANNELS_DIR}/${i}.html`, data);
  });
};

gen_channels();
Creating a TV class
Now that we have channels, we’d have to create a way to navigate to channels!
I created a TypeScript class for the TV, aptly called TV.
This class is responsible for:
- Listening on the serial port for incoming messages
- Executing code in response to each type of message
- Loading new HTML files from the
channelsdirectory, or “changing the channel”, when clicking a channel up or down button - Maintaining current channel state
- Increasing or decreasing volume when clicking the volume up or down buttons
- Muting when clicking the mute button
- Turning the TV “on” or “off” when clicking the left power button
- Closing the application window upon clicking the right power button
I don’t have much more to say about it, so here’s just the code with some comments!
TV.ts
// This is my TV class
// It has language like a TV would and is responsible for
// receiving messages and changing channels

import { SerialPort } from "serialport";
const loudness = require('loudness')

import { CHANNEL_FILES, CHANNELS_DIR } from "./utils";

// This is defined in the Arduino file!
enum ButtonPressed {
  CHANNEL_UP = "CHANNEL_UP",
  CHANNEL_DOWN = "CHANNEL_DOWN",
  POWER_BUTTON = "POWER_BUTTON",
  SUPER_POWER_BUTTON = "SUPER_POWER_BUTTON",
  VOLUME_UP = "VOLUME_UP",
  VOLUME_DOWN = "VOLUME_DOWN",
  MUTE = "MUTE",
}

export default class TV {
  static port: SerialPort;
  static window: Electron.BrowserWindow;

  static isOn = false;
  static channel = 0;

  static volume = 50;
  static muted = false;

  static initialize(
    path: string, // What port to listen to. In this case, which USB port.
    baudRate: number,
    window: Electron.BrowserWindow
  ) {
    TV.port = new SerialPort({ path, baudRate });
    TV.window = window;
    loudness.setVolume(TV.volume);

    // Switches the port into "flowing mode"
    TV.port.on("data", function (data) {
      const buttonPressed = data.toString().trim();
      switch (buttonPressed) {
        case ButtonPressed.CHANNEL_UP:
          TV.channel =
            TV.channel + 1 > CHANNEL_FILES.length - 1 ? 0 : TV.channel + 1;
          TV.changeChannel(TV.channel);
          break;
        case ButtonPressed.CHANNEL_DOWN:
          TV.channel =
            TV.channel - 1 < 0 ? CHANNEL_FILES.length - 1 : TV.channel - 1;
          TV.changeChannel(TV.channel);
          break;
        // My remote weirdly had two power buttons
        // One of them "turns the TV off" by playing an animation
        // Though it plays an OFF animation, the program is still running and can be
        // turned back on again.
        case ButtonPressed.POWER_BUTTON:
          TV.isOn ? TV.turnOff() : TV.turnOn();
          break;
        // The other kills the window completely, thus making it unresponsive to future
        // remote commands
        case ButtonPressed.SUPER_POWER_BUTTON:
          TV.port.close();
          TV.window.close();
        case ButtonPressed.VOLUME_UP:
          TV.volume += 15;
          loudness.setVolume(TV.volume);
          break;
        case ButtonPressed.VOLUME_DOWN:
          TV.volume -= 15;
          loudness.setVolume(TV.volume);
          break;
        case ButtonPressed.MUTE:
          TV.muted = !TV.muted;
          loudness.setMuted(!TV.muted);
          break;
        default:
      }
    });
  }

  static turnOn() {
		// These on and off files are nearly identical to the channel HTML files...
		// Just without additional staitc on top.
    TV.window.loadURL(`file://${__dirname}/../assets/turnon.html`).then(() => {
      setTimeout(() => TV.changeChannel(TV.channel), 600);
    });
    TV.isOn = true;
  }

  static changeChannel(index: number) {
    TV.window.loadURL(`file://${__dirname}/../${CHANNELS_DIR}/${index}.html`);
  }

  static turnOff() {
    TV.window.loadURL(`file://${__dirname}/../assets/turnoff.html`);
    TV.isOn = false;
  }
}
Starting it up
Of course, just having a TV class isn’t good enough…we need to put the TV in a room to watch!
By that, I mean we have to have it called by something else, notably a main function.
main.ts
/**
 * Having a main method (and/or class) is common practice for Electron.
 *
 */
import { BrowserWindow } from "electron";
import TV from "./TV";

export default class Main {
  static mainWindow: Electron.BrowserWindow;
  static application: Electron.App;
  static BrowserWindow;

  private static onWindowAllClosed() {
    if (process.platform !== "darwin") {
      Main.application.quit();
    }
  }

  private static onClose() {
    // Dereference the window object.
    Main.mainWindow = null;
  }

  private static onReady() {
    Main.mainWindow = new Main.BrowserWindow({
      fullscreen: true,
      darkTheme: true,
      webPreferences: {
        contextIsolation: true,
        nodeIntegration: false,
        webSecurity: false,
        autoplayPolicy: "no-user-gesture-required", // < --- moved to here
      },
      backgroundColor: "#000000",
    });
    // Uncomment for chrome dev tooling
    // Main.mainWindow.webContents.openDevTools();

    // Instead of loading an index file, load an off state
    Main.mainWindow.loadURL("file://" + __dirname + "/../assets/off.html");
    Main.mainWindow.on("closed", Main.onClose);
    // My USB port path and baud rate
    // If I weren't so lazy, I might have this path in a .env, but really I don't know what
    // anyone would do with this information. Would just make it nicer for others to use
    TV.initialize("/dev/cu.usbmodem14101", 9600, Main.mainWindow);
  }

  static main(app: Electron.App, browserWindow: typeof BrowserWindow) {
    // we pass the Electron.App object and the
    // Electron.BrowserWindow into this function
    // so this class has no dependencies. This
    // makes the code easier to write tests for
    app.commandLine.appendSwitch("autoplay-policy", "no-user-gesture-required");
    Main.BrowserWindow = browserWindow;
    Main.application = app;
    Main.application.on("window-all-closed", Main.onWindowAllClosed);
    Main.application.on("ready", Main.onReady);
  }
}
And lastly, we have to call our main method in our app.ts file, which is also an Electron (and many other framework) convention
import { app, BrowserWindow } from "electron";
import Main from "./Main";

Main.main(app, BrowserWindow);
Easy!
Final Product
There were a few other little things I didn’t mention, like the turning on and off animations, but with what’s above you should get a general view of what was done to make this project possible!
If you’re interested in seeing the code in its entirety, GitHub - karomancer/ir_receiver: A fun little fake TV made for the “Learning the World, One Thing at a Time” ITP class at NYUA fun little fake TV made for the “Learning the World, One Thing at a Time” ITP class at NYU - karomancer/ir_receiver
So here’s what I got on the tech side. Unfortunately, I didn’t make a video of me doing the whole bit with the history as well, but if anyone really wanted that, I could maybe do it again.
I’m pretty proud of how this turned out! I spent a total of 14 hours on this project, from research to last lines of code (but not including writing this all up).
If I had infinite time, I’d love to implement overlays to show channel number and volume level, and support more remote functionality.